
- Matzoh, unleavened bread, is eaten in place of bread during Passover to remind us that Hebrew slaves fled Egypt so quickly that their bread did not have time to rise.
Passover is a holiday full of symbolic foods to help recall the story of the Jewish Exodus from Egypt. It’s a favorite holiday of most Jews, including secular ones, for its meaningful ritual and celebration of spring, life and freedom. When I think that people have celebrated this holiday in this way for more than 2,000 years, it never fails to move me.
During the seder, a ritual meal, the story of the Exodus is retold using special foods on the seder plate as edible reminders. One of those foods is charoset (you don’t pronounce the “c” but it makes the “h” more guttural), a mixture of apples, nuts, wine and cinnamon that is said to represent the mortar the Hebrew slaves used in building structures for their taskmasters in ancient Egypt.
There are actually many varieties of charoset made around the world, some with sugar or honey, some with dates or other dried fruit, some cooked for a long time and some that look a lot more like mortar than my family’s version.
Ours is simple: Just mince apples and walnuts, add some sweet wine (yes, Manischewitz is traditional) and cinnamon.

Making the charoset this morning, I used this old-fashioned nut chopper with a spring, which I use only once a year. Actually there are two choppers, and I think the other, a double handled curving affair works better for the apples, I think. I inherited both from my mother.
Usually, I try to avoid cluttering my kitchen with things I use so seldom, but the nut choppers definitely get a pass. They are tangible reminders of my childhood, when my mother always gave me the pleasurable assignment of chopping the apples and nuts for charoset, using the special nut choppers and a wooden bowl.

How many apples and nuts, how much wine and cinnamon? There is no recipe; just do whatever seems right.
Memories flooded back as I chopped the sweet apples and walnuts with the springy nut chopper, and remembered all the things my parents did to prepare for Passover, as well as all the things they kept that we would use only once a year during the holiday. Two complete sets of dishes (as they kept kosher and needed separate dishes for the holiday), two sets of silverware, pots and pans — we hauled all of these up from the basement in a series of orchestrated loads, while my parents taped up the cabinets holding the usual dishes, pots and pans so they would be clearly off limits.
Anything from the rest of the year that had to be used during Passover was “kashered,” a ritual that captured our rapt attention on the night before the holiday. A giant pot, containing the items covered in water, was set in the middle of the kitchen floor, while my father heated a large stone on the kitchen burner until it turned blazing red. Then, handling it with tongs, he dropped it into the water. Sitting at a safe distance on the stairway steps, we watched with fascination as the water erupted into a furiously bubbling boil.
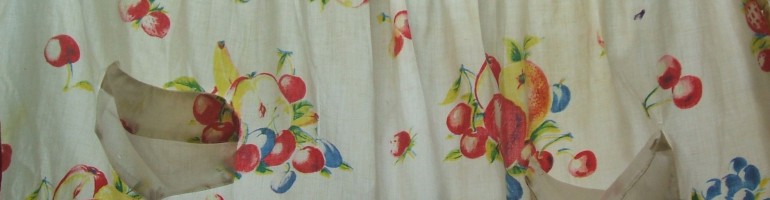
 This was my favorite of the Passover plates, with an image of apple pickers!
I think my mother might have gotten these dishes with A & P Grocery store coupons. I used to like to try to count all the apples in the picture before or after eating.
Though I love bread and baked goods (as anyone who has read this blog knows) I enjoy the restrictions of Passover too–and all the edible and tangible memories it brings with it.

For a sweet treat–since one can’t make the usual pies, cakes and cookies–sometimes I make meringues, adding grated orange zest to the recipe below. I also often love making a chocolate nut torte, with no flour — a cake with a great history, which I’ve written about here.

And this year, I am bringing a fruit salad and some non-traditional but very popular matzo-toffee-crunch (click the link for a recipe) for dessert to Seder at a friend’s home.
Whatever you decide to make for Passover, it’s best not to get too stressed about a holiday that celebrates freedom. And I always try to find some calm and quiet moments to contemplate the Passover apple plate, and see if I can count all the apples…..
Note: This post was originally published in 2011 and edited and added to in 2018
Nut-and-chocolate-studded meringues
Makes about 25-30 — you can cut recipe in half if you like
- 4 egg whites, room temperature
- 1/4 teaspoon cream of tartar
- 1 cup plus 2 tablespoons sugar
- 3/4 cup coarsely chopped pecans, walnuts or hazelnuts
- 4 ounces bittersweet chocolate, cut into tiny cubes (or use chocolate chips)
Preheat the oven to 275 degrees and lay a sheet of parchment paper (or aluminum foil) atop a cookie sheet, and lightly flour with matzo meal.
- Whip the egg whites with the cream of tartar until they form soft peaks; then add 1/2 cup of sugar, beating until whites are very shiny and gradually adding the rest of the sugar in two batches.
- Fold in the nuts and the chocolate (and if you like, some grated orange rind), and spoon the mixture in mounds on the baking sheet, using about one tablespoon for each meringue. If you like, place a pecan or other nut half on top of each one (I didn’t do that).
- Bake for 30 minutes; then reduce the oven to 250 degrees and bake another 30 minutes until firm and dry and easy to remove. Cool and store in an airtight container. If meringues become sticky, you can re-crisp them in a 200 degree oven for 30 minutes.
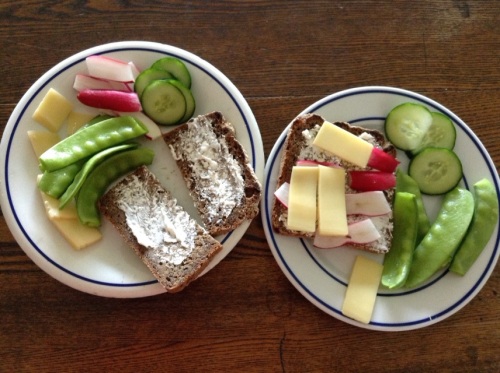 SOMETIMES it is refreshing not to cook, but rather to assemble a few choice items together on your plate. Such was this light lunch after a bicycle trip to the local farmers’ market, where we got the fresh snow peas, radishes, cucumber and a loaf of delicious hearty Mountain Rye from Raven Breads. We already had some butter and cheese to complete the late spring/early summer plate. The fresh colors of the peas, cucumber and radishes looked especially attractive, I thought. And it all tasted as fresh and lovely as it looked.

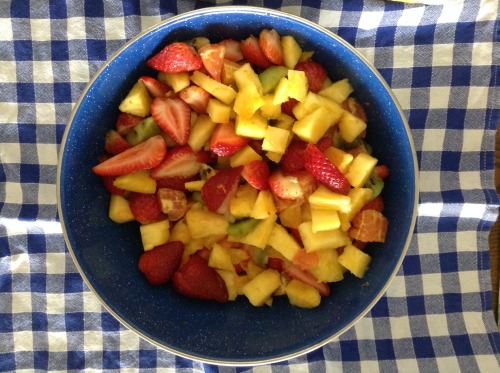 Every year on Mother’s Day, my daughter used to make fruit salad for me. What a treat — the colors and flavors combining in a joyous medley.


 ONE OF MY FAVORITE THINGS about summer is my everyday breakfast. It’s simple: plain yogurt, topped with fresh fruit and granola. But each day I enjoy it with seasonal fruit– raspberries, blackberries, blueberries, apricots, peaches, plums or pears — and I consider it a treat!


 MY FRIEND NANCY knew that I often baked bread using
